How to Integrate Stripe Checkout With Flask to Accept Payments
Stripe Implementation
We want people to be able to actually purchase products, so we'll have to integrate with a payment processor to handle payments with credit cards. Stripe is an example of a payment processor that can help businesses accept one time payments, recurring payments, and distributing payments.
For this section, we'll go through an example of integrating with Stripe's Checkout product, which provides us with a hosted payment form that supports many different methods of payment, including payments for countries outside the US. Stripe can also handle sending receipts, fraud detection, and a lot of other tricky details around payment processing.
In the process of implementing this integration, we will see how to build our own custom Flask extension, receive webhooks, and robustly mock external APIs in tests.
High Level Implementation.
To implement Stripe Checkout, we will redirect users to a page on stripe.com when they click purchase. Here the user will see a payment form. When a user successfully completes their transaction, Stripe will first ping our server to tell us that the transaction has completed successfully, and then will redirect users back to our site.
Signup for Stripe
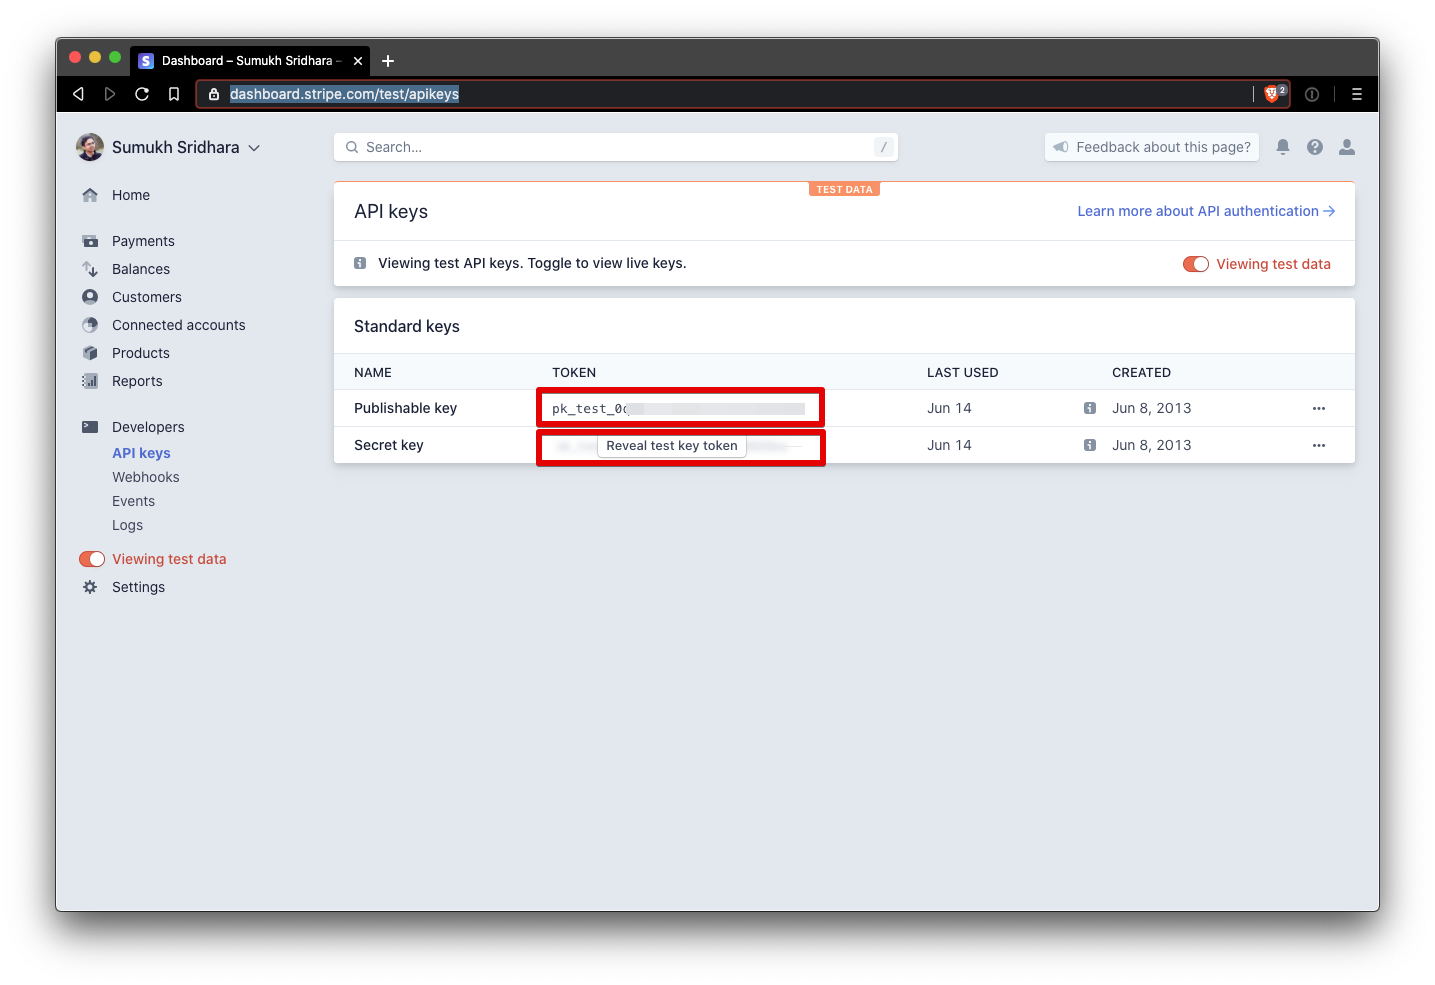
Sign up for an account on Stripe.com. You can instantly get test environment credentials.
To get your Test API keys, you can navigate to dashboard.stripe.com/test/apikeys which will provide you with a "publishable key" and a "secret key".
We're going to need the stripe Python library, so add that to your requirements.txt as well and run pip install -r requirements.txt.
We'll also want the Stripe command line interface, which you can install at https://stripe.com/docs/stripe-cli.
Configuring our Stripe extension
In order to actually call the Stripe API, we need to set some credentials. First, let's set some defaults in the application configuration within yumroad/config.py
class BaseConfig:
    ...
    STRIPE_SECRET_KEY = os.getenv('STRIPE_SECRET_KEY', 'sk_test_k1')
    STRIPE_PUBLISHABLE_KEY = os.getenv('STRIPE_PUBLISHABLE_KEY', 'sk_test_k1')
In our terminal, we can export the actual values into our environment variables.
export STRIPE_WEBHOOK_KEY='...'
export STRIPE_PUBLISHABLE_KEY='...'
Now our Stripe credentials are accessible through the application config attribute. Instead of directly calling the stripe library from within our controllers, we should wrap all of our Stripe specific logic into a separate module.
In order to pass in the application configuration variables, we can follow a similar pattern to all of the extensions we have been using by creating our own custom library following the pattern that Flask extensions use to get application configuration information. By having a single instance that is already configured during the create_app function, we will have a object that we can access from anywhere in our app without worrying about configuration.
Our first step is to create our library in a file as yumroad/payments.py.
import stripe

class Checkout
    def init_app(self, app):
        # Store application config credentials & perform setup here
        stripe.api_key = app.config.get('STRIPE_SECRET_KEY')
        self.publishable_key = app.config.get('STRIPE_PUBLISHABLE_KEY')

    def do_action(self, args):
        # Perform Stripe specific actions
        pass
In yumroad/extensions.py, we'll instantiate the object.
from yumroad.payments import Checkout

checkout = Checkout()
And finally, within yumroad/__init__.py, we will call create_app
from yumroad.extensions import (..., checkout)

def create_app(environment_name='dev'):
    ...
    checkout.init_app(app)
If we were making this a Flask Extension used by other applications, we'd also want to support initialization by passing
appduring instantiation as that is used by applications that don't use the application factory pattern (create_app) of setting up a Flask app.
class Checkout:
    def __init__(self, app=None):
        if app:
            self.init_app(app)
    ...
# Usage: checkout = Checkout(app)
Redirecting
In order to redirect users to a checkout page, we first need to create a Session on Stripe with the details of a product.
In order to create a session, we need to pass a few things into Stripe.
stripe.checkout.Session.create(
    payment_method_types=['card'],
    client_reference_id="the product id",
    line_items=[{
        'name': "Product Name",
        'description': "A description",
        'amount': 1000, # in cents
        'currency': 'usd',
        'images': ["https://example.com/image.png"],
        'quantity': 1,
    }],
    mode='payment',
    success_url="page to send users after success",
    cancel_url="page to send users if they cancel",
)
Most of the attributes we can get directly as the attributes of the Product model, but we don't have a specific URL to redirect users to after checkout, so we'll make one that will accept the ID of the Stripe session and whether or not the payment was successful as URL parameters.
In the products blueprint (blueprints/products.py), add a new post_checkout route.
from flask import ..., flash

@product_bp.route('/product/<product_id>/post_checkout')
def post_checkout(product_id):
    product = Product.query.get_or_404(product_id)
    purchase_state = request.args.get('status')
    post_purchase_session_id = request.args.get('session_id')
    if purchase_state == 'success' and post_purchase_session_id:
        flash("Thanks for purchasing {}. You will receive an email shortly".format(product.name), 'success')
    elif purchase_state == 'cancel' and post_purchase_session_id:
        flash("There was an error while attempting to purchase this product. Try again", 'danger')
    return redirect(url_for('.details', product_id=product_id))
We can't rely on the success argument here to fulfill our order as anyone could potentially load this page. Instead we'll get a webhook before Stripe redirects our users back. That allows us to safely show a success message.
The success URL that we pass to Stripe can now look something like http://oursite.com/product/1/post_checkout?status=success.
We don't know what the ID of the session will be before we create it and since we want the success_url to have access to the session ID, we need to tell Stripe to include it. If the string {CHECKOUT_SESSION_ID} appears in the redirect URL that we pass into Stripe, their API will replace it with the real session ID before redirecting our users.
To generate that URL, you might think that something like this call to url_for would work (using _external=True to generate the full URL including the hostname).
url_for('product.post_checkout', product_id=product.id,
                              session_id='{CHECKOUT_SESSION_ID}',
                              status='success',
                              _external=True)
However, url_for escapes the value of { and } and produces http://localhost:5000/product/1/post_checkout?session_id=%7BCHECKOUT_SESSION_ID%7D&status=success
That's not quite what we need, so to unescape the URL, we'll import a function from the built in urllib.
from urllib.parse import unquote
unquote(url_for('product.details', product_id=product.id,
                session_id='{CHECKOUT_SESSION_ID}',
                status='success',
                _external=True))
This will produce a redirect URL of http://localhost:5000/product/1/post_checkout?session_id={CHECKOUT_SESSION_ID}&status=success.
Now that we have our redirect URLs, create a method called create_session within payments.py where we'll pass in a Product.
from urllib.parse import unquote
from flask import url_for
import stripe

class Checkout:
    ...
    def create_session(self, product):
        if not product.price_cents:
            return
        success_url = unquote(url_for('product.details', product_id=product.id,
                              session_id='{CHECKOUT_SESSION_ID}',
                              status='success',
                              _external=True))
        failure_url = unquote(url_for('product.details', product_id=product.id,
                              session_id='{CHECKOUT_SESSION_ID}',
                              status='cancel',
                              _external=True))
        session = stripe.checkout.Session.create(
                    payment_method_types=['card'],
                    client_reference_id=product.id,
                    line_items=[{
                        'name': product.name,
                        'description': product.description,
                        'amount': product.price_cents,
                        'currency': 'usd',
                        'images': [product.primary_image_url],
                        'quantity': 1,
                    }],
                    mode='payment',
                    success_url=success_url,
                    cancel_url=failure_url,
                    )
        return session
This lesson preview is part of the Fullstack Flask: Build a Complete SaaS App with Flask course and can be unlocked immediately with a single-time purchase. Already have access to this course? Log in here.
Get unlimited access to Fullstack Flask: Build a Complete SaaS App with Flask with a single-time purchase.

[00:00 - 00:10] In this video, we're actually going to build our Stripe implementation. And to build our Stripe implementation, we're going to have to first sign up for Stripe and get some test API keys.
[00:11 - 00:17] Here I've loaded up the page where we can pull up publishable key and secret key. That's what we're going to need.
[00:18 - 00:30] You can also go to live mode if your application to be live on Stripe is approved. But for our purposes, we just need a test account, which is something we can sign up for right away.
[00:31 - 00:43] Once you sign up for your Stripe account, we're also going to have to install the Stripe library. So go ahead and go into your requirements.txt file and add Stripe as a requirement.
[00:44 - 00:50] Great. To run pip install-r requirements.txt, we're going to install Stripe.
[00:51 - 01:00] So here it's installed everything we need to get Stripe's library in our application. Now we're going to have to configure our Stripe extension.
[01:01 - 01:11] So first off, we're going to go into our config and we're going to go and set some values, namely the ones for our Stripe secret key and our Stripe publishable key. So let's go and set those here.
[01:12 - 01:18] We're also eventually going to need a Stripe webhook key. So I'm just going to paste all three of those here.
[01:19 - 01:25] So here this will give us all of our defaults. And again, in your terminal, you're going to want to set these values.
[01:26 - 01:34] So you're going to want to say export Stripe secret key is equal to an export stripe publishable key is equal to in your terminal. Okay.
[01:35 - 01:44] Now that we've set our variables, what we can do is we can create our own library where we can work with Stripe. So I'm going to call mine payments.py.
[01:45 - 01:52] Here I'm going to import Stripe. Then I'm going to go ahead and build out our checkout extension.
[01:53 - 02:12] So inside of here, what we want to do is build an init app and the init app is going to essentially load our config variables. So once we're passed in the app, it's going to load some configs from the app config.
[02:13 - 02:24] Then we're, we might build some other functions here to do things. So this allows us an easy interface that we can import anywhere in our app.
[02:25 - 02:38] So once we have this checkout library, we can instantiate in the extensions.py similar as if it was an external extension. So what we're going to do here is going to say from yumroad.payments, we're going to import checkout.
[02:39 - 02:54] And then once we have checkout, we're going to import it in init.py for yumroad . So here we want checkout as well.
[02:55 - 02:59] Slides getting a little long, so it's a little formatting there. Okay.
[03:00 - 03:04] And then we're going to pass in our app here, checkout init app. Okay.
[03:05 - 03:16] And this has been initialized. And what we can do now is we want to actually end up creating things here.
[03:17 - 03:30] For example, something that we're going to need to be able to do is creating sessions in our Stripe integration. So here you can see in order to run a checkout, we're going to first have to be able to create a session.
[03:31 - 03:42] And a session involves setting up a bunch of things here, like what products and how much we should charge our users. So we can wrap that in a function in our checkout class.
[03:43 - 03:58] So what we're going to do is we're going to create a method called create session and create sessions going to take in a product, then we're going to have Stripe create a session and we're going to pass in the details of our product. So product image and price sense.
[03:59 - 04:04] But what we do need to create is a success URL or a failure URL. So let's go and set those first.
[04:05 - 04:17] Within products.py, let's create a page where we can send users after they complete their checkout. So in products.py, what we can call this is post checkout.
[04:18 - 04:27] And what we can do is we can say we're going to get the product. And if it looks like the checkout has been successful, we're going to tell them that it's been successful.
[04:28 - 04:35] And if it looks like the checkout failed for whatever reason, we're going to warn them about that. So I'm going to add that at the bottom of the product blueprint here.
[04:36 - 04:47] I'm going to say we're going to depend on this status argument being set. And if the status argument is set, we can redirect the users accordingly.
[04:48 - 04:58] And so this is going to be product ID similar to that. It's going to be post checkout.
[04:59 - 05:15] So this is the URL we want Stripe to take our users to if it's successful or if it fails. So now our job is to go into this checkout class and pass those in as either the success URL or the failure URL.
[05:16 - 05:26] So here I've added our two success or failure URLs. And what we're doing here is we're allowing Stripe to pass us back the checkout session ID.
[05:27 - 05:43] So if we pass in this exact string here to Stripe in the success URL, it will inform us what session ID was involved. So that can be a useful feature if you need to do any debugging or track that for whatever reason.
[05:44 - 06:00] One thing that's a little annoying though is because of how Flask is going to template out these variables, it's going to make this URL safe. So instead of looking like checkout session ID, it's going to look like percent sign seven be checkout session ID.
[06:01 - 06:09] And that's not what we want. So in order to do that, we're going to have to import a function called unquote from a Python built in library there.
[06:10 - 06:38] And we're going to wrap both of our URL fours in there. All this is allowing us to do is to get a page that looks like localhost 5000 product to post checkout and session ID is equal to.
[06:39 - 06:54] So that's what this function is getting. If we didn't have unquote, this would have looked like percent seven and percent seven D. And that's not really great.
[06:55 - 06:59] So we wanted to look exactly like this. And that's what unquote does for us.
[07:00 - 07:07] Okay. So now we have a function that's going to take in a product and create a stripe session.
[07:08 - 07:21] We can then go ahead and use that on the front end to actually send users there . So going to the products blueprint, we're going to have to import the checkout extension that we had defined here.
[07:22 - 07:29] And then we're going to have to create a session. So first off, to create a session, we're going to have to do two things.
[07:30 - 07:47] One of them is to call the checkout module. And the next one is we're going to have to get the publishable key.
[07:48 - 07:57] The front end is going to need that to actually render or redirect. So the way we're going to get that is we can simply access it from the checkout class.
[07:58 - 08:07] So here we've set that as publishable key. So stripe publishable key and stripe session.
[08:08 - 08:39] Let's go and pass those into the template. So this is going to be a dictionary.
[08:40 - 08:51] And what we want to do is handle the case where this returns none. So in the case where it returns none and it doesn't give us anything, we still want to be able to render the page.
[08:52 - 09:05] We just want to be able to say that the product is sold out, for example. So now our job is to go on the template here and to define some stuff that will allow us to send users to stripe.
[09:06 - 09:16] So on the details page, what we want to do is we're going to have to define a JavaScript snippet, which will allow us redirect users to stripe. I'm going to paste that in here.
[09:17 - 09:29] So what this does is it loads stripe.js from stripe and it instantiates stripe in JavaScript with our publishable key. And then this function redirects users to the checkout page.
[09:30 - 09:35] And if that fails, it's simply going to alert them. Okay.
[09:36 - 09:40] So now our button just needs to call purchase. So do that.
[09:41 - 09:57] We can say if the checkout session ID is set, we're going to make a button that on click calls the purchase function and says buy for this amount of money. Going back here, let's go and make sure that everything points to the right page.
[09:58 - 10:07] So we want this going to post checkout and the session to be created using the product price sense. Okay.
[10:08 - 10:21] Once we've imported everything we need like URL for and set the right routes, we should be able to load it. Now, it's important that in our terminal, we've set our stripe secret key and publishable key in our environment.
[10:22 - 10:38] Once we've done that, we should be able to load our page. And then if we check the source code of the page, we'll see here that stripe is including the publishable key and we're using it to initialize stripe.js and then have this redirect function.
[10:39 - 10:43] So let's go and test this out. What happens when I click redirect?
[10:44 - 10:52] It takes me to this page where I can actually buy the page. And so what I can do now is I can enter some data here as a customer and a fake card data.
[10:53 - 11:04] So stripe has a few card numbers that are recognized as valid fake cards. And so I can go ahead and try and submit this and see what happens.
[11:05 - 11:10] So here we'll see what happens when we complete a transaction. It'll say thank you for purchasing our book.
[11:11 - 11:21] And when we cancel a transaction, it'll come back and say there was an error trying to purchase this product, which is exactly what we wanted. Okay.
[11:22 - 11:35] Now we have to think about actually how to implement giving users a notification that their product was successfully purchased to fulfill our order. We're going to have to implement webhooks, which is next.
[11:36 - 11:46] So we're going to create a new file in your blueprints and we'll call this one checkout.py. And here we're going to import a new blueprint.
[11:47 - 11:57] So we're going to do all of our normal work around blueprints. One other thing we're going to have to do here is we're going to have to exempt all of the routes we do from CSRF protection.
[11:58 - 12:04] So let's go ahead and say from remote.extensions import CSRF. Great.
[12:05 - 12:13] To define our blueprint, we can say blueprint and we'll call it checkout and we 'll give it a name. Great.
[12:14 - 12:25] Now the first one is we're going to have to implement a generic one to listen for stripe webhooks. So to do that, what we want to do is create a URL that stripe will listen to.
[12:26 - 12:32] So I'm going to create one here called webhooks slash stripe. And all it's going to do is return.
[12:33 - 12:38] Okay. But this job is going to be to parse the data that stripes sends to us in a web hook.
[12:39 - 12:54] Now if you look at the documentation for webhooks on stripes website, you can read more about what webhooks are. But the important one is that there are a variety of kinds of webhooks and stripe will send us that for every event.
[12:55 - 13:09] One thing we're going to have to be cautious of is that since the webhook is just publicly accessible, anyone could call it. So we should probably verify that the webhook is actually coming from stripe and not someone who's just trying to get a free product from our store.
[13:10 - 13:28] So we can do that with stripe webhook verification, which is the detail on our documentation, but we're also going to do it in our application right now. So in order to parse the data from a webhook, what we can do is we can actually add this functionality into our stripe extension that we've created in payment stuff.
[13:29 - 13:45] So what we want to do is we want to create a function that given some HTTP data , it's going to return us the dictionary of data that was actually sent over to us. So the way we can do that is by adding a function to stripe called parse web hook.
[13:46 - 13:53] So this one's going to look at the headers. It's going to validate the stripe signature that was included and it'll raise an error if it was invalid.
[13:54 - 14:09] Otherwise, it's going to return to us an object that we can use. So then going back in our checkout.py file, we can actually just look at the data that it's giving us by simply calling checkout.parse webhook.
[14:10 - 14:18] So from yemor.extends, we're going to need to import checkout. And from class, we're going to need to import request to parse that data.
[14:19 - 14:32] Then what we can do is we can do an if statement to say, if an event was a certain type, we're going to perform a certain action. And then regardless, I'm going to go and print event data.
[14:33 - 14:38] So we always get a look at what webhooks were sent to us. Okay.
[14:39 - 14:46] So this is a great way for us to parse the webhooks. Let's go ahead and go into init and make sure that our webhook works.
[14:47 - 14:50] So we're going to say checkout. And we're going to say this is checkout blueprint.
[14:51 - 14:55] And we're going to go ahead and register our checkout blueprint. Great.
[14:56 - 15:12] At this point, we're going to be able to render and parse webhooks. But how our webhooks going to get to us, usually in our stripes settings, we're able to set a specific place where we want webhooks to go.
[15:13 - 15:23] For example, I can configure webhooks to go to this address. But what I want to be able to do is I want to say something like localhost 5000 , that doesn't quite work.
[15:24 - 15:35] Fortunately, Stripe gives us a nice way to handle that. The Stripe CLI allows you to forward webhooks to your own computer.
[15:36 - 15:43] And that's very useful. So you should install the Stripe CLI, which they have instructions for on their documentation.
[15:44 - 15:53] And then we're going to use the webhook and help that forward to a specific port in URL. All right.
[15:54 - 15:56] So let's configure that. Okay.
[15:57 - 16:08] Once we're there, we can run Stripe login in another terminal window. And that will allow us to run a command that will forward our webhooks to a specific URL.
[16:09 - 16:15] So I want to go to 4 5000 slash webhook slash right. Okay.
[16:16 - 16:27] And then it gives us a signing secret, which is something we're going to use. We just got there.
[16:28 - 16:37] Back in our server, we're going to go and say our Stripe webhook key is equal to the value we just got there. Now we can run our server.
[16:38 - 16:44] I'm going to run a flash server here. And I'm still going to have the Stripe CLI listening here.
[16:45 - 16:53] So the Stripe CLI is just on another tab. All right.
[16:54 - 17:02] So now that everything works, let's go back into our browser and see what happens. So I'm going to go back into Firefox.
[17:03 - 17:19] And this time I'm going to go ahead and go check out the book. So let's go see what happens when I go ahead and create this with a valid credit card.
[17:20 - 17:28] Okay. A bunch of things happen.
[17:29 - 17:37] So back in our Stripe CLI, we can see a ton of webhooks got created. So this is our flash log showing what happened.
[17:38 - 17:46] And if we switch to our Stripe CLI, our Stripe CLI will also show us a bunch of things that happen. So here's our Stripe CLI.
[17:47 - 18:00] And it started showing us all the webhooks. So it gave us one for charge that succeeded, give us one for payment method.att ached, gave us one for the checkout session that's completed and customer created and a payment intent.
[18:01 - 18:09] And for all of those, our server responded with the 200. Now looking at what our server actually saw, it's on a bunch of details here.
[18:10 - 18:30] So all of this was sent to us as event data, which is great. So there's a bunch of events, but looking back at our code, we only want to do something if the checkout session is actually completed.
[18:31 - 18:39] So let's go and do that. I'm looking at the book blog here and I'm seeing that when our transaction is completed, we're also getting this client reference ID.
[18:40 - 18:45] The client reference ID is something we passed along. That's the product ID for what we want.
[18:46 - 18:52] So going back to our code, we're going to want to get that product. So we're going to do a few things.
[18:53 - 18:58] First off is we're going to get the session. And to get the session, that allows us to do a few things.
[18:59 - 19:08] One of which is we can go and check that there is a customer associated with this. Now another thing that we're provided here is a customer information.
[19:09 - 19:21] And on the customer object, we're actually going to get information like the customer's email along a few other things. So our job is going to be to also fetch the customer in our strike logic.
[19:22 - 19:29] So that's another method we're going to have to add. I'm thinking that our logic will look something like this.
[19:30 - 19:34] We're going to say get customer of session.customer. Okay.
[19:35 - 19:45] Going into payments, we're going to add in a new method here to get customer. And this one's a simple wrapper around the Stripe API.
[19:46 - 19:49] All it does is does stripe.customer.retrieve. Okay.
[19:50 - 20:02] Back here now, we can check that we have both a customer and a user. So we can say, if not customer or product, we can abort the request.
[20:03 - 20:10] But if it is complete, what we want to do is we want to send a purchase email. So let's go and create a purchase email and email.py.
[20:11 - 20:32] So what we're going to do here is send something that looks like this. We're also going to have to create a new template as well for our purchase.
[20:33 - 20:38] Okay. I've posted in some code here, but basically it says you successfully purchased the product.
[20:39 - 20:50] If you have any questions, reply to this email and the store has been CC'd. And we can assume that the store is going to take care of actually delivering the products to our customer in this example.
[20:51 - 20:53] Okay. So now we have a purchase email.
[20:54 - 21:11] So now that we have a purchase email, we can go in here and we can say from yum road.mail import send purchase email. And what we can do is when we're sending a purchase email, we can just send it to the customer and there's going to be a dot email object there and a product.
[21:12 - 21:16] Okay. And I only want to print the event data if it's a checkout session completed.
[21:17 - 21:20] We can ignore all of the other types as well. All right.
[21:21 - 21:29] Let's see what happens now. So we can go through the checkout flow once again and enter in the fake data that Stripe provides us with.
[21:30 - 21:37] There's a bunch of fake card numbers that you can use in test mode and they won 't actually bill you. It's pretty, pretty important.
[21:38 - 21:39] Okay. Once we fill it out, we're going to see what happens.
[21:40 - 21:44] We're probably going to get an email in our inbox. Okay.
[21:45 - 21:58] So now you can see our expensive book actually did show up here and this is great. It's CC'd both the purchaser and the owner.
[21:59 - 22:08] So now we have a working Stripe checkout. And if we go back into our Stripe blog and dashboard, we can't just see that all of these purchases went through.
[22:09 - 22:18] So if we go to payments, we can see here that all of these went through and our dashboard, we can see how much revenue we're doing. So these are all working as intended.